With the rising cost of electricity and the unreliable power supply in many parts of Nigeria, more homes and businesses are turning to solar energy. Installing a solar system may seem complicated at first, but with the right guidance, even beginners can understand the process and make informed decisions. This step-by-step guide walks you through how to install a solar panel system in Nigeria, from planning to powering on your system.
Step 1: Assess Your Energy Needs
Before buying anything, you need to know your power requirements. This helps you choose the right system size (1kW, 3kW, 5kW, etc.).
What to do:
1. List all appliances you want to power (TV, fans, fridge, lights, pumping machine, etc.).
2. Check the wattage of each appliance.
3. Estimate how many hours per day each appliance runs.
4. Calculate total daily energy consumption (watt-hours).
Why this is important: Nigeria has many “guesswork” solar installations that fail quickly because the system was too small. A proper load assessment ensures your solar system works efficiently without overloading.
Step 2: Choose the Right Components
A complete solar system in Nigeria includes:
1. Solar Panels
These convert sunlight into electricity.
Choose monocrystalline panels for better efficiency under Nigeria’s hot weather.
2. Charge Controller
This regulates the power from the panels to the batteries.
Two main types:
PWM – cheaper but less efficient.
MPPT – more efficient and highly recommended for Nigerian conditions.
3. Batteries
Batteries store energy for night use or cloudy days.
Common options:
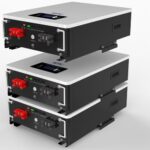
Lithium-ion (best performance, long lifespan)
Gel or AGM (more affordable, shorter lifespan)
4. Inverter
Converts DC power from the batteries to AC power for home appliances.
Popular in Nigeria: 1.5kVA, 3.5kVA, 5kVA hybrid inverters.
5. Mounting Structure & Accessories
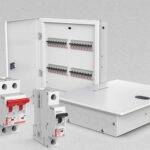
Includes mounting brackets, cables, breakers, fuses, connectors, earth rods, and distribution boards.
Step 3: Select the Installation Location
Choosing the right place for your panels is crucial for maximum sunlight exposure.
-Mount panels on a north-facing roof for optimal sunlight.
-Ensure there are no trees, tall buildings, or shadows blocking the panels.
-Panels should be tilted at about 10–15 degrees depending on your region.
-Use strong aluminum mounting rails to handle wind and heavy rainfall.
Step 4: Install the Mounting Structure
This is the foundation of the solar installation.
How to do it:
1. Mark the placement on the roof.
2. Drill holes and attach the mounting rails securely.
3. Ensure all components are tightened firmly to withstand strong winds.
4. Use stainless steel bolts to avoid rust.
Tip: Improper mounting is one of the main reasons panels fall off during storms in Nigeria. Always prioritize stability.
Step 5: Install and Connect the Solar Panels
Once the mounting is secure, install the panels.
Steps:
1. Place the panels on the mounting rails.
2. Use clamps to secure them.
3. Connect panels either in series or parallel, depending on system voltage requirements.
4. Use MC4 connectors to ensure weatherproof connections.
Safety tip: Always work with insulated gloves and avoid wiring under direct sunlight to reduce shock risk.
Step 6: Install the Charge Controller
The controller should be mounted close to the inverter and battery bank.
Steps:
1. Connect the solar panels to the controller (PV input).
2. Connect the batteries to the controller (BAT output).
3. Check polarity carefully: reverse connections may damage components.
MPPT controllers are highly recommended in Nigeria because they significantly increase energy harvest.
Step 7: Connect the Batteries
Place batteries in a cool, well-ventilated room.
Connection steps:
Connect battery terminals using thick copper cables.
Never mix old and new batteries.
Avoid placing batteries directly on the floor; use wooden or metal stands.
Lithium batteries need proper BMS monitoring, so follow the manufacturer’s guidelines.
Step 8: Install the Inverter
Mount the inverter on a wall close to the battery bank.
Steps:
1. Connect the batteries to the inverter using thick DC cables.
2. Connect the inverter output to the house distribution board.
3. Install protective devices like:
-DC breakers
-AC breakers
-Surge protectors
-Earthing system
Step 9: Test the System
Before switching on, check:
Are all cables correctly connected?
Are fuses and breakers installed?
Are there loose wires?
Is the inverter configured for solar?
Once confirmed, turn on the inverter and observe the system for at least 30 minutes.
Step 10: Maintain Your Solar System
Solar panels require minimal maintenance.
Basic maintenance checklist:
Clean panels once every 2–4 weeks.
Ensure batteries are dry and well-ventilated.
Monitor inverter logs for errors.
Tighten any loose connections annually.
Good maintenance ensures your system lasts 10–25 years.
GO SOLAR WITH ENERGYMALL TODAY!!
To see more of our available solar panels, click here